Digital Forensics and Incident Response on Macs

(0) Methodology
--> Identify suspicious connection
--> Identify suspicious process
--> Capture network traffic
--> Find persistent mechanism
--> Check user accounts and groups
--> Check command-line, bash and logIns/logouts history
--> Check applications
--> Check activity and download history on browsers
--> Check network sharing
--> Other MacOS open source forensics tools
(1) Check Network Connections
- Look at TCP connections resolving domain addresses
netstat -p TCP

- Look at TCP connections with the IP addresses
netstat -p TCP -n

- Look at TCP connections checking Receive/Transmit bytes resolving domain addresses
netstat -p TCP -b

- Look at TCP connections checking PIDs and their sockets resolving domain addresses
netstat -p TCP -v

- The best netstat command on Mac :) to see connections with PIDs, sending/receiving bytes
netstat -p TCP -nbv

- Look at connections using lsof clear format - not resolving domains
lsof -i Pn

(2) Check Processes
- Look at running processes sorted by CPU usage, updating every 5 seconds:
top -ocpu -s 5

(Note that if you want to look at the processes by memory usage --> top -o rsize)
- - Look at running processes including PIDs and full commands
ps -eo pid,%cpu,%mem,command

Note that it is recommended to export to a txt file to see the full commands:
ps -eo pid,%cpu,%mem,command > ~/Downloads/processcommands.txt
You can sort processes by CPU size with:
sort -nrk 2 ~/Downloads/processcommands.txt
- Look at Activity Monitor checking CPU and Network usage

- Use the Sample Process function to check a process in detail

- The Sample Process window shows the first launch time and process path of the process


(3) Capture Network Traffic
- - Check interfaces and dump network trafficnetstat -isudo tcpdump -i any -w ~/Downloads/mac.pcapstat ~/Downloads/mac.pcap
- - You can use tshark to see live network flow by filtering protocolnetstat -J 'tcp http'netstat -J 'tcp https'
- - You can capture network traffic using tshark and read the captured packetstshark -i en0 -J 'tcp' -w ~/Downloads/capture-mac.pcaptshark -r ~/Downloads/capture-mac.pcap 
- - You can use DNS query filter using tshark tshark -i en0 -f "src port 53" -n -T fields -e dns.qry.name -e dns.a
Note, you can extract files from PCAP over an SMB and HTTP protocols using Tshark:tshark -nr mac.pcap --export-objects smb, ~/Downloads tshark -nr mac.pcap --export-objects http, ~/Downloads
- - Check interfaces and dump network traffic
netstat -i
sudo tcpdump -i any -w ~/Downloads/mac.pcap
stat ~/Downloads/mac.pcap
- - You can use tshark to see live network flow by filtering protocol
netstat -J 'tcp http'
netstat -J 'tcp https'
- - You can capture network traffic using tshark and read the captured packets
tshark -i en0 -J 'tcp' -w ~/Downloads/capture-mac.pcap
tshark -r ~/Downloads/capture-mac.pcap
- - You can use DNS query filter using tshark
tshark -i en0 -f "src port 53" -n -T fields -e dns.qry.name -e dns.a
Note, you can extract files from PCAP over an SMB and HTTP protocols using Tshark:
tshark -nr mac.pcap --export-objects smb, ~/Downloads
tshark -nr mac.pcap --export-objects http, ~/Downloads
(4) Check User Accounts and Groups
- Look at all user accounts (Malicious account can be found under /bin/bash folder)cat /etc/passwd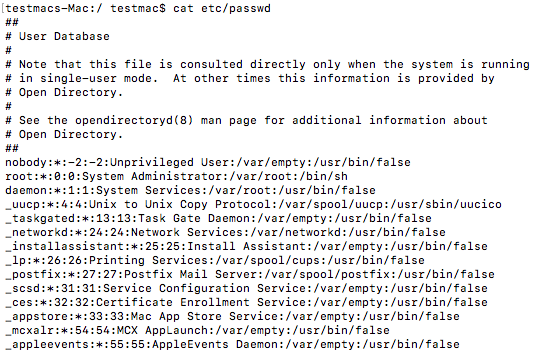
- Look at last 10 created groups
tail -n 10 /etc/group
- See the privileged user accounts under groups (Who is admin? and sudo?)grep -E <USERNAME> /etc/group
- See the privileged user accounts under groups (Who is admin? and sudo?)
grep -E <USERNAME> /etc/group
- To view the contents of a shadow file for a user:
sudo plutil -p /var/db/dslocal/nodes/Default/users/<username>.plist
- To get the hash: sudo defaults read /var/db/dslocal/nodes/Default/users/<username>.plist ShadowHashData|tr -dc 0-9a-f|xxd -r -p|plutil -convert xml1 - -o -
Note: Starting with Lion, there is a shadow file per user. All of those are stored in /var/db/dslocal/nodes/Default/users directory and are accessible by root only
to see all shadow files under plistsls -lha /var/db/dslocal/nodes/Default/users
- Look can find all pslist files of a created user accountsudo find / -name *.plist | grep <USERNAME>
- Look can find all pslist files of a created user account
sudo find / -name *.plist | grep <USERNAME>
(5) Check Bash and LogIns/Logouts History
- Use the History command on the terminal to see bash commands

- Use the Last on the terminal to see display the list of all the users logged in and out since the file /var/log/wtmp was created. One or more usernames can be given as an argument to display their login in (and out) time and their host-name.
- You can monitor authentication failures using log streamlog stream --predicate '(eventMessage CONTAINS "failed")' --style syslog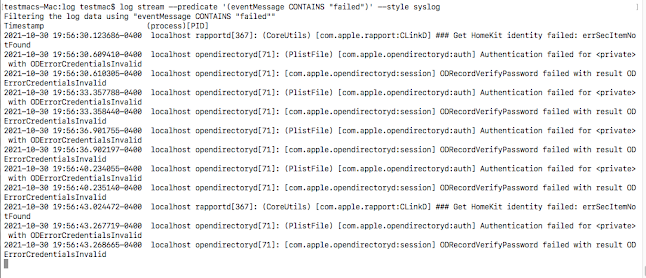
- You can see the frequently visited folders under Finder plistsudo plutil -p ~/Library/Preferences/com.apple.finder.plist - macOS does create a separate document for each Terminal session and uses a string of random number and letters to identify each session. See the commands in a session:cat /Users/testmac/.bash_sessions/<SESSIONID>.history
- You can see the frequently visited folders under Finder plist
sudo plutil -p ~/Library/Preferences/com.apple.finder.plist
- macOS does create a separate document for each Terminal session and uses a string of random number and letters to identify each session. See the commands in a session:
cat /Users/testmac/.bash_sessions/<SESSIONID>.history
(6) Check Activity and Download History on Browsers
- Check Safari Browser search historysudo plutil -p ~/Library/Preferences/com.apple.Safari.plist
- Check the downloaded file paths and source URLS sudo plutil -p ~/Library/Safari/Downloads.plist | grep 'DownloadEntry\|EntryPath' - Check the recently closed browser tabssudo plutil -p ~/Library/Safari/RecentlyClosedTabs.plist
 - Check the search activities with their descriptionssudo plutil -p ~/Library/Safari/SearchDescriptions.plist
(7) Check Applications
Run ls -lhaO /Applications to see file directory including the hidden files with human-readable file size- Check Safari Browser search history
sudo plutil -p ~/Library/Preferences/com.apple.Safari.plist
- Check the downloaded file paths and source URLS
sudo plutil -p ~/Library/Safari/Downloads.plist | grep 'DownloadEntry\|EntryPath'
- Check the recently closed browser tabs
sudo plutil -p ~/Library/Safari/RecentlyClosedTabs.plist
- Check the search activities with their descriptions
sudo plutil -p ~/Library/Safari/SearchDescriptions.plist
(7) Check Applications

- Check Applications if there is an abnormal program by adding the DateCreated and Version columns without terminal

(8) Check Persistent Tasks/Applications
- Check user-level LaunchAgents under Library folder
cd /Library/LaunchAgents
ls
sudo plutil -p /Library/LaunchAgents/<application>.plist
- Check system-level LaunchAgents under System/Library folder
cd /Library/LaunchAgents
ls
sudo plutil -p /System/Library/LaunchAgents/<application>.plist
This part is from SentinelOne's great article:
Since user LaunchAgents require no privileges to install, these are by far the easiest and most common form of persistence seen in the wild.
Some legitimate LaunchDaemons point to unsigned code that could itself be replaced by something malicious. For example, the popular networking program Wireshark uses a LaunchDaemon,
/Library/LaunchDaemons/org.wireshark.ChmodBPF.plist
that executes unsigned code at the path:
/Library/Application Support/Wireshark/ChmodBPF/ChmodBPF
Even Apple itself uses a LaunchDaemon that isn’t always cleaned up immediately such as
/Library/LaunchDaemons/com.apple.installer.cleanupinstaller.plist
This points to an executable in the /macOS Install Data folder that could be replaced by malicious code.
LaunchDaemons or LaunchAgents which take a property list (plist) file that specifies the application that needs to be executed after reboot. The difference between LaunchAgents and LaunchDaemons is that LaunchAgents run code on behalf of the logged-in user while LaunchDaemon run code as root user.
Example:
When a malicious application starts, it can create a plist file under the “Library/LaunchDaemons” directory. Also, the malware can check “getpwuid( getuid())” returns the user id of the current process. If a user id is returned, it can create a plist file under the LaunchAgents directory: “Library/LaunchAgents/”.
You can look for launch agent in /Library/LaunchAgents or ~/Library/LaunchAgents
- Look at system-level LaunchDaemons under /Library/LaunchDaemons folder
cd /Library/LaunchDaemons
ls
sudo plutil -p /Library/LaunchDaemons/<application>.plist
Threat actors can drop property lists and create a persistent mechanism using launched.
The new cron jobs will require user interaction to install in 10.15 Catalina, it’s unlikely that this will do much to hinder attackers using it as a persistence method.
Kernel extensions can be used for persistent behavior, but in general kexts are not common trick among malware authors as they are comparatively difficult to create, lack stealth, and can be easily removed.
...
Admins with security solutions that do not have behavioral AI detection should monitor processes executing with osascript and ScriptMonitor in the command arguments to watch out for this kind of threat.
An even more wily trick leverages Mail rules, either local or iCloud-based, to achieve persistence by triggering code after sending the victim an email with a specially-crafted subject line. This method is particularly stealthy and will evade many detection tools.
Defenders can manually check for the presence of suspicious Mail rules by parsing the ubiquitous_SyncedRules.plist file and the SyncedRules.plist file for iCloud and local Mail rules, respectively. A quick bash script such as
grep -A1 "AppleScript" ~/Library/Mail/V6/MailData/SyncedRules.plist
will enumerate any Mail rules that are calling AppleScripts. If any are found, those will then need to be examined closely to ensure they are not malicious.
...
Also, it is recommended to check Periodics. Anything additional found in there should be treated as suspicious and inspected.
- Check Periodics
ls -lha /etc/periodic
ls -lha /etc/periodic/daily

(9) Check File Directory
- Look at files if there is an unusual filels -lhaO /
- Look at files if there is an unusual filels -lhaO ~/

Note that if an application attempts to access files in a directory protected by TCC without user authorization, the file operation will fail. TCC stores these user-level entitlements in a SQLite3 database on disk at $HOME/Library/Application Support/com.apple.TCC/TCC.db Apple uses a dedicated daemon, tccd, for each logged-in user (and one system level daemon) to handle TCC requests. These daemons sit idle until they receive an access request from the OS for an application attempting to access protected data.
(10) Check Network Sharing
- Use Terminal to check SMB Profile in a local network checking /Library/Preferences/SystemConfiguration/com.apple.smb.server.plist folder
plutil -p com.apple.smb.server.plist

- You can disable SMB shares if needed during an incident
Go to /etc/nsmb.conf and Set the signing_required value to “no”
If there is no nsmb.conf file, use this:

(11) MacOS Open Source Forensics Tools
OSXCollector is a forensic evidence collection & analysis toolkit for OSX.
Steps:
Terminal:
cd ~/Downloads
sudo python osxcollector/osxcollector.py
strings <OUTPUTFILE> | grep <STRING>
by dfirist@gmail.com
Comments
Post a Comment